
Our app can integrate with Woo-Commerce, Shopify so as to synchronize orders and products. If you don’t use the two platforms, you’re able to directly create order by virtual store. There are many ways to place orders with PGPrints:
-
- Manual create orders with/without campaigns ==> Video Demo
- Import Orders with CSV==> Refer here – Video Demo
- Sync orders from online stores (WooCommerce/Shopify based online stores) ==> Video Demo
- Use Open API (for developers) ==> Refer here
*)First of all, Login or Create Account here if you don’t have account on our app. Then check your mailbox for activated email (maybe spam box)
1. Manual create orders with/without campaigns ==> Video Demo
If you don’t use 2 platforms mentioned above, you can directly create order on app or import CSV. You may create virtual store according to below instruction
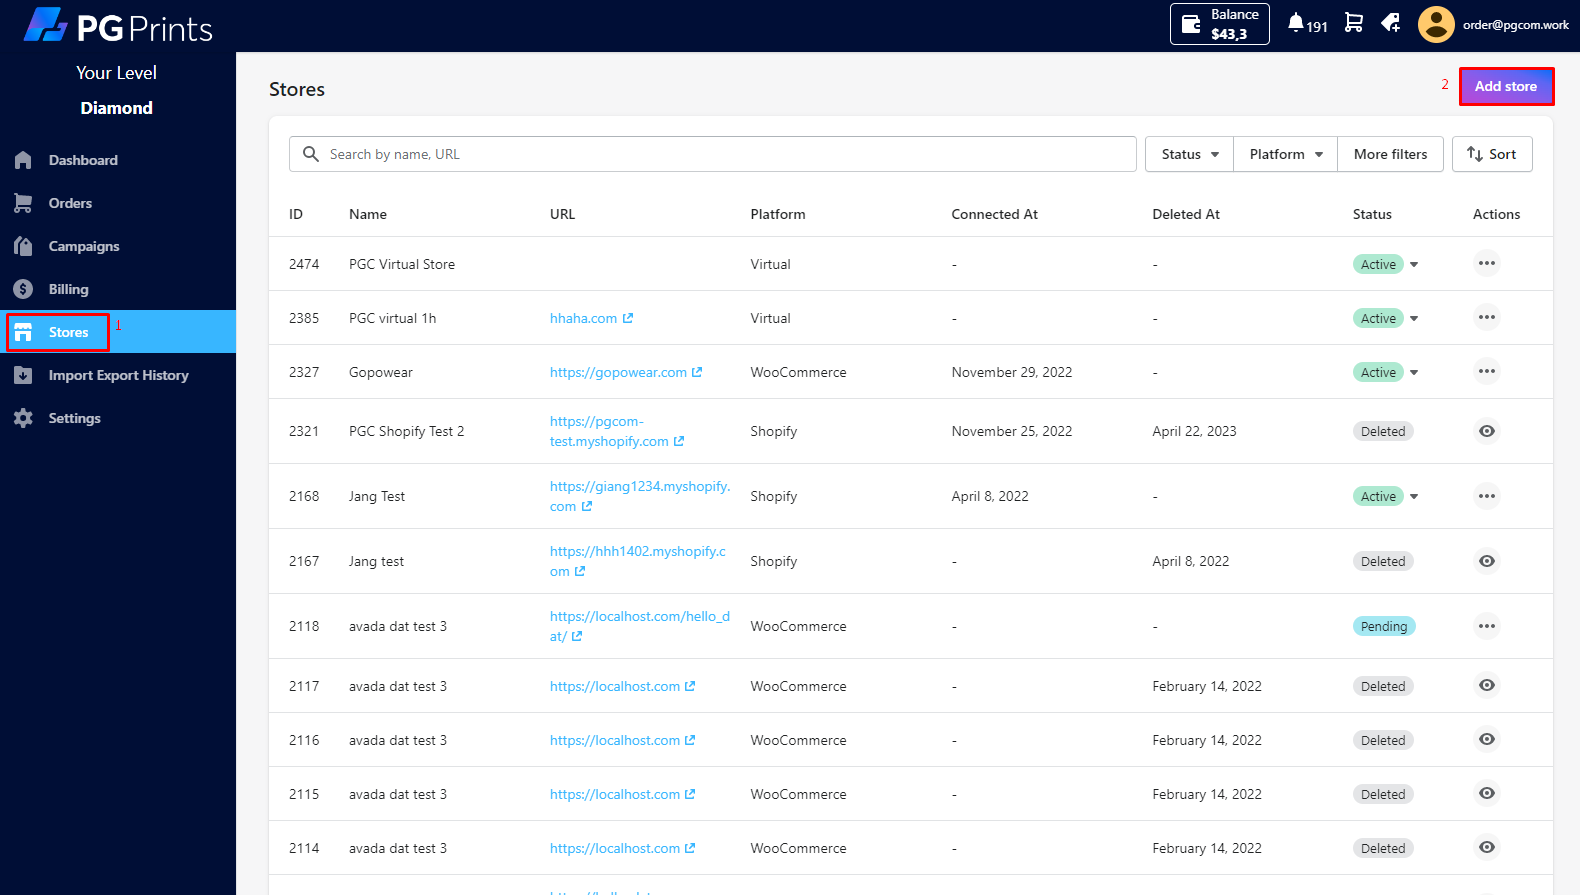
- Click Stores -> Add store

- Fill information -> Submit
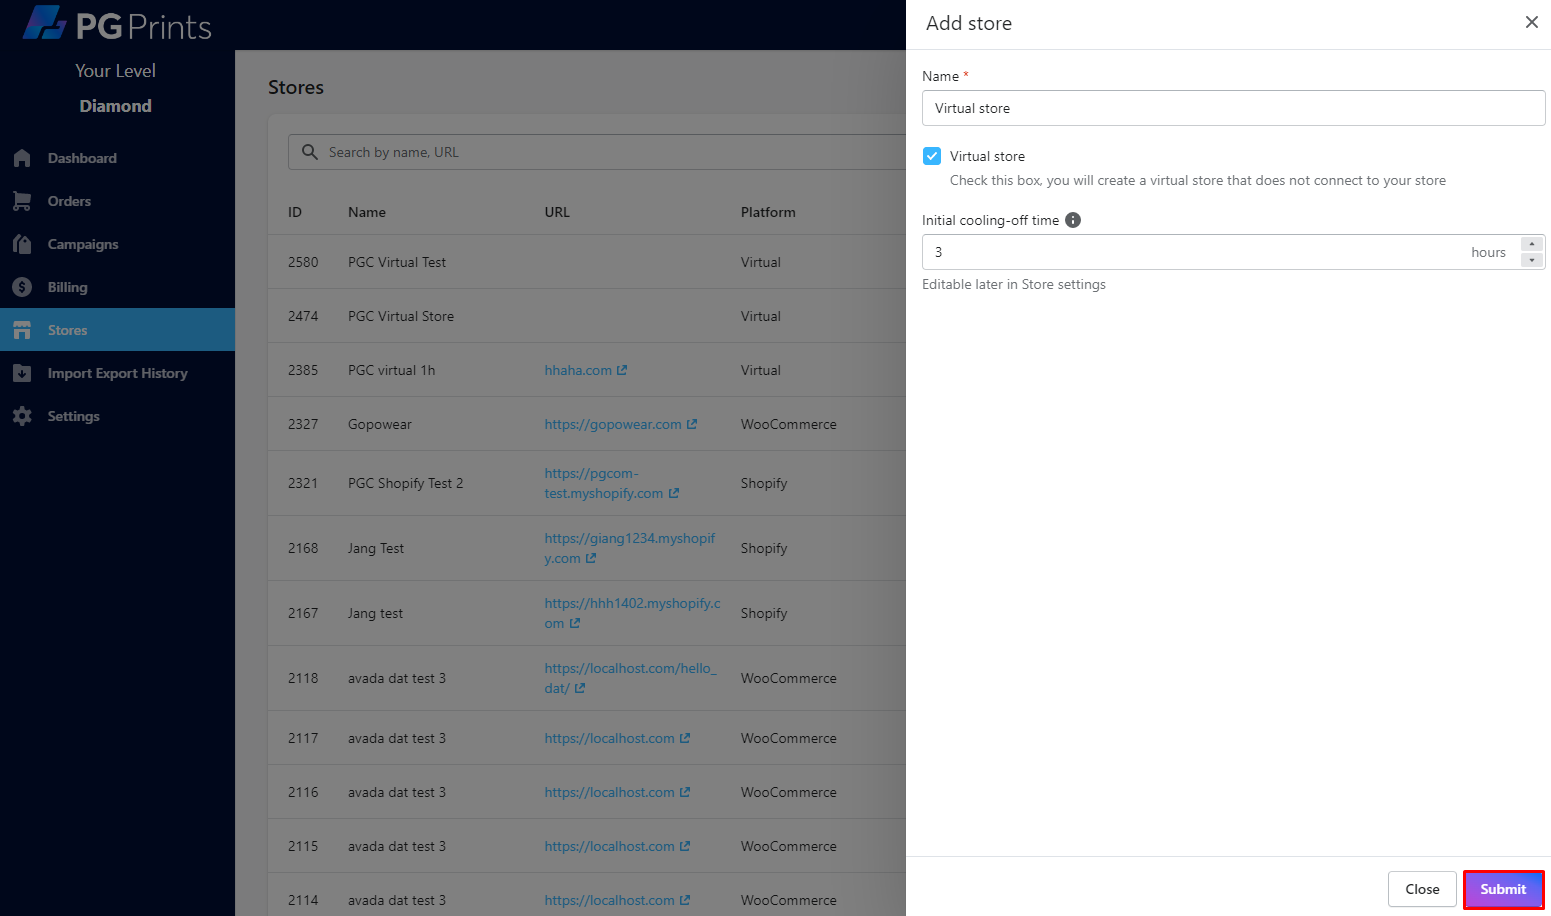
– Fill name of your virtual store
– Tick box to confirm you will create a virtual store that does not connect to your store
– Set cooling-off time
- Directly create order on app:
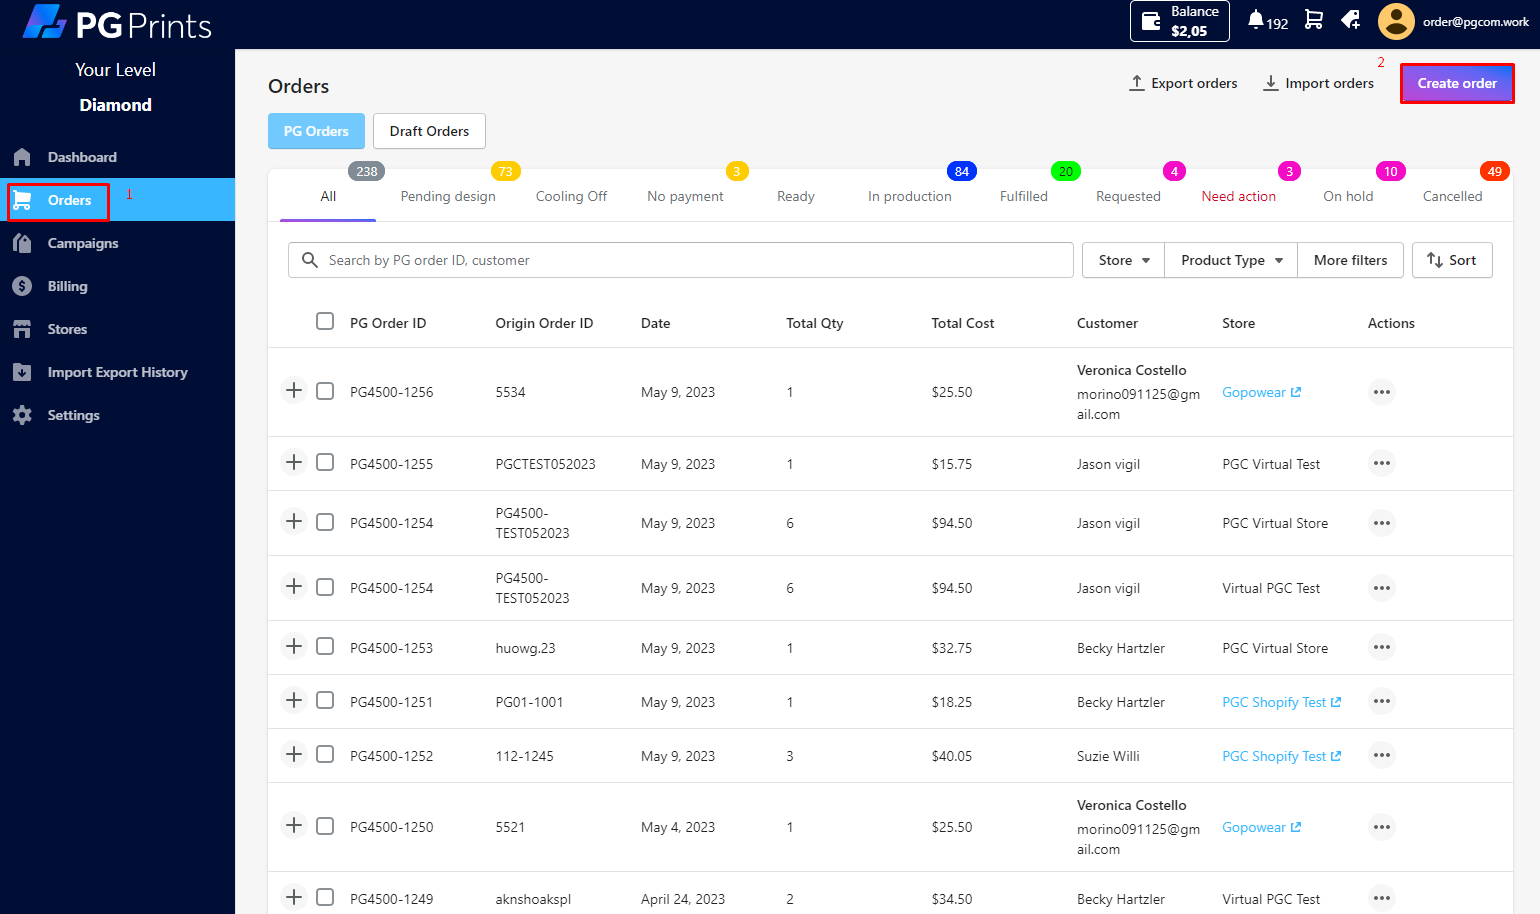
– Step 1: Click to Orders -> Create Order
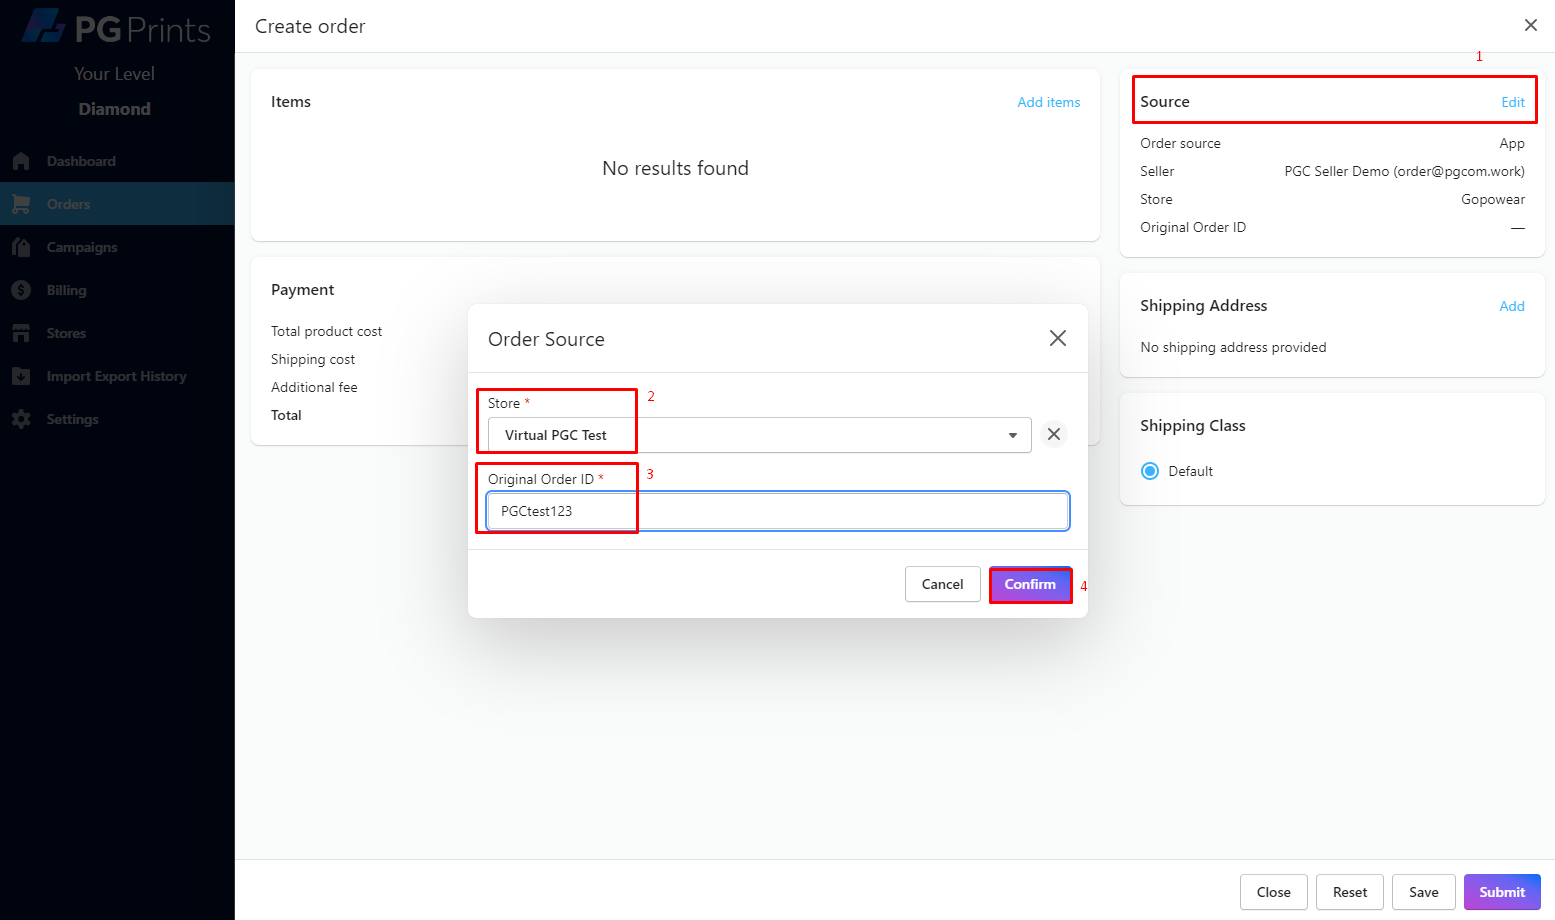
– Step 2: Click to Edit in Source -> select Store and fill in Original Order ID -> Confirm.
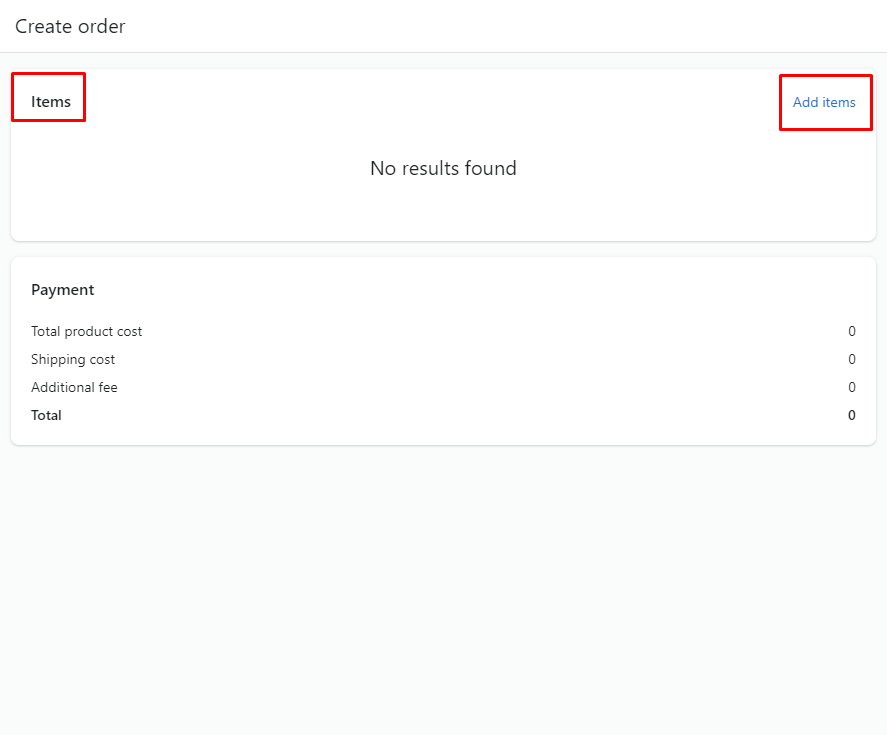
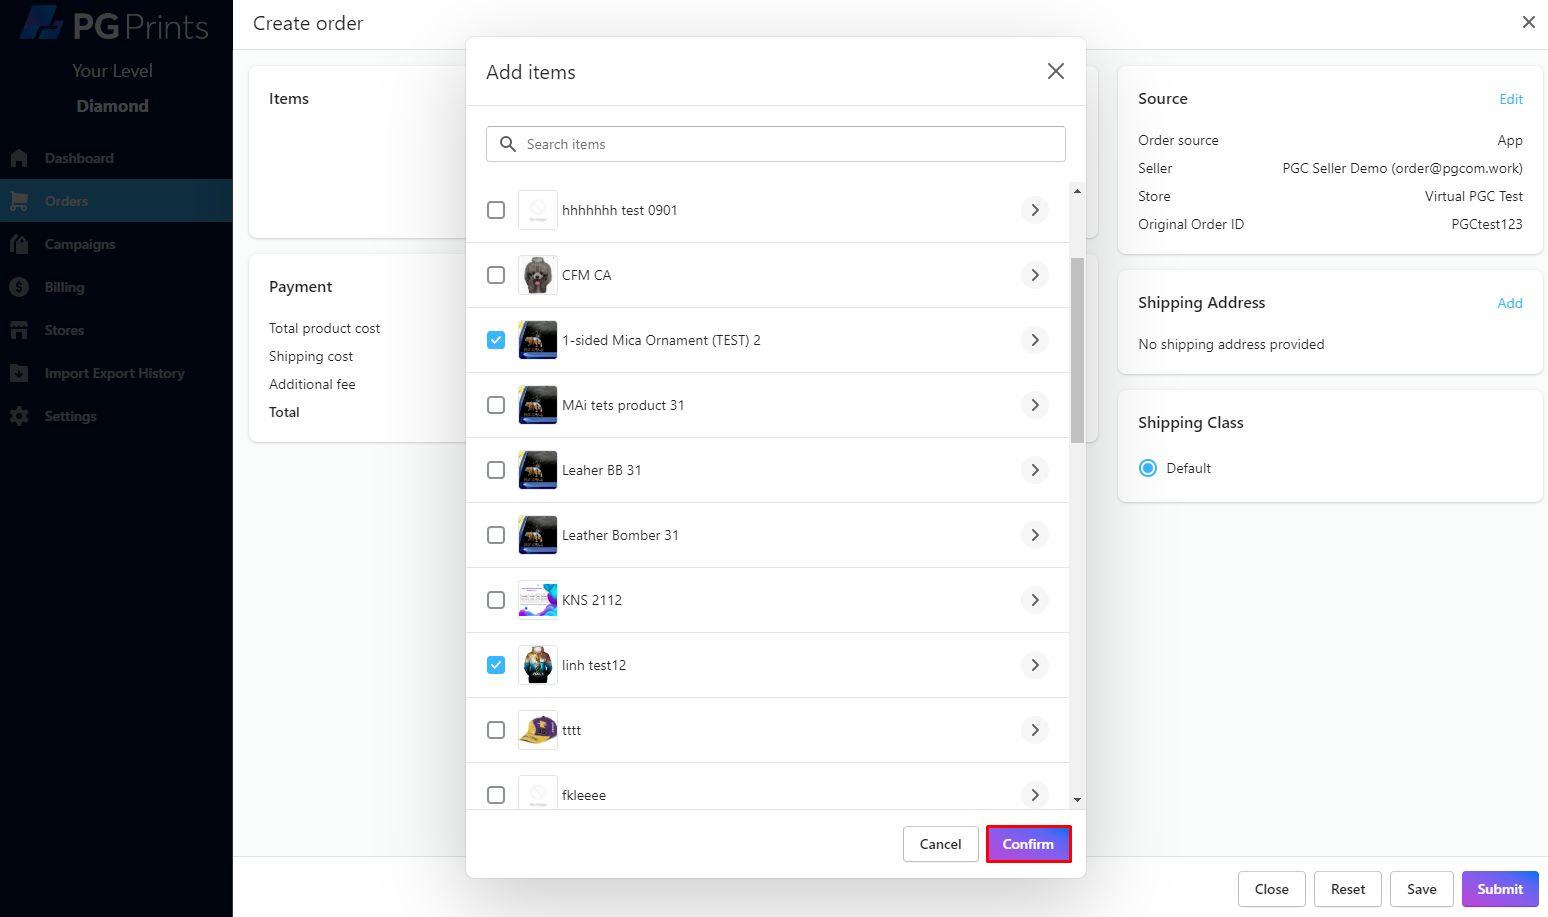
– Step 3: Click to Items -> Add items -> Select the item that you want to add (we can choose several items at once) -> Confirm.
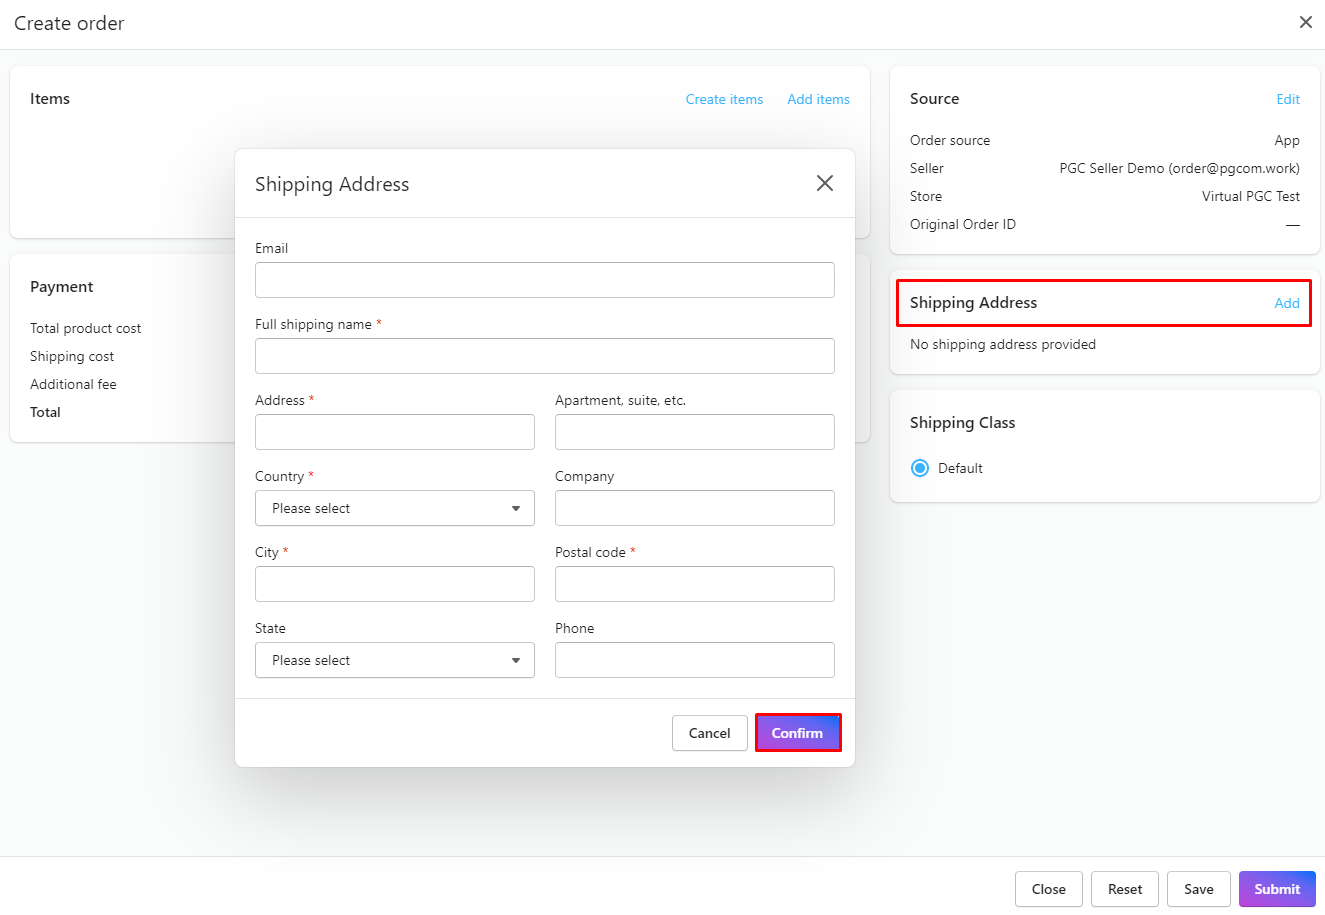
– Step 4: Shipping Address, click to Add -> fill required information -> Confirm.
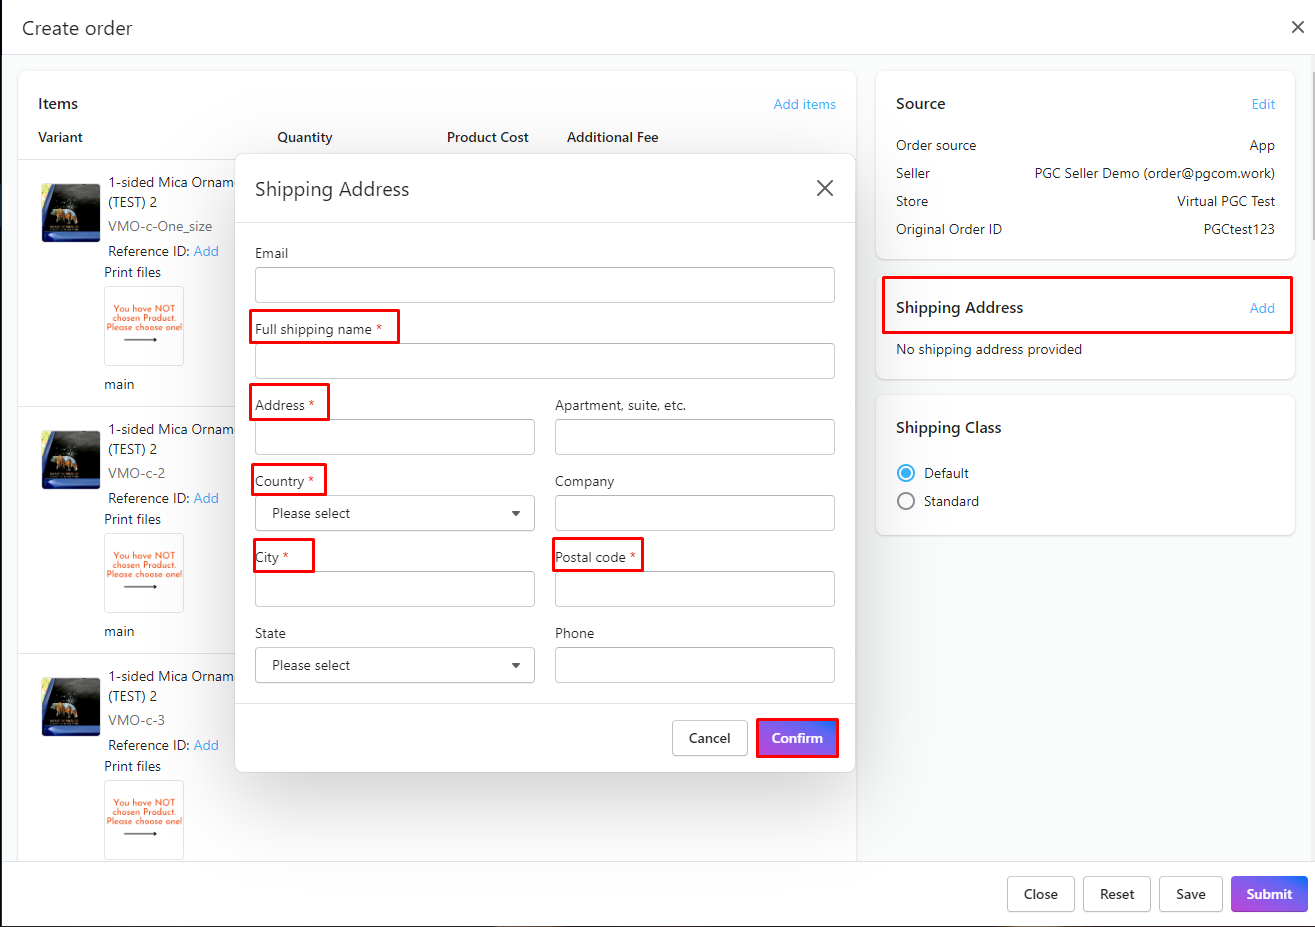
*)Note: Boxes marked with an (*) is compulsory information, the rest is optional. However, we recommend all orders should have phone number. In case of orders without phone number, PGPrints can not take responsibility for lost or return of goods during transportation.
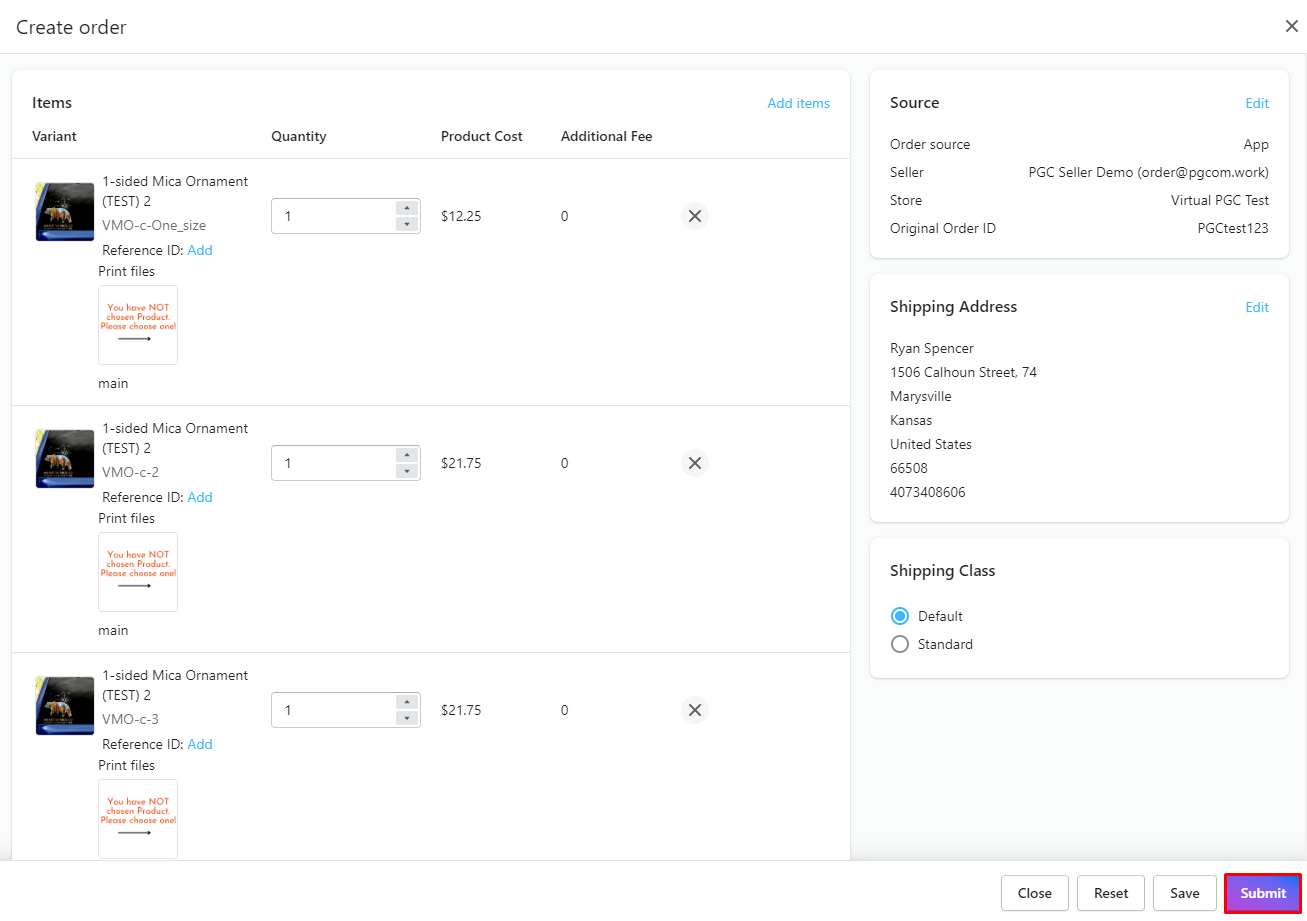
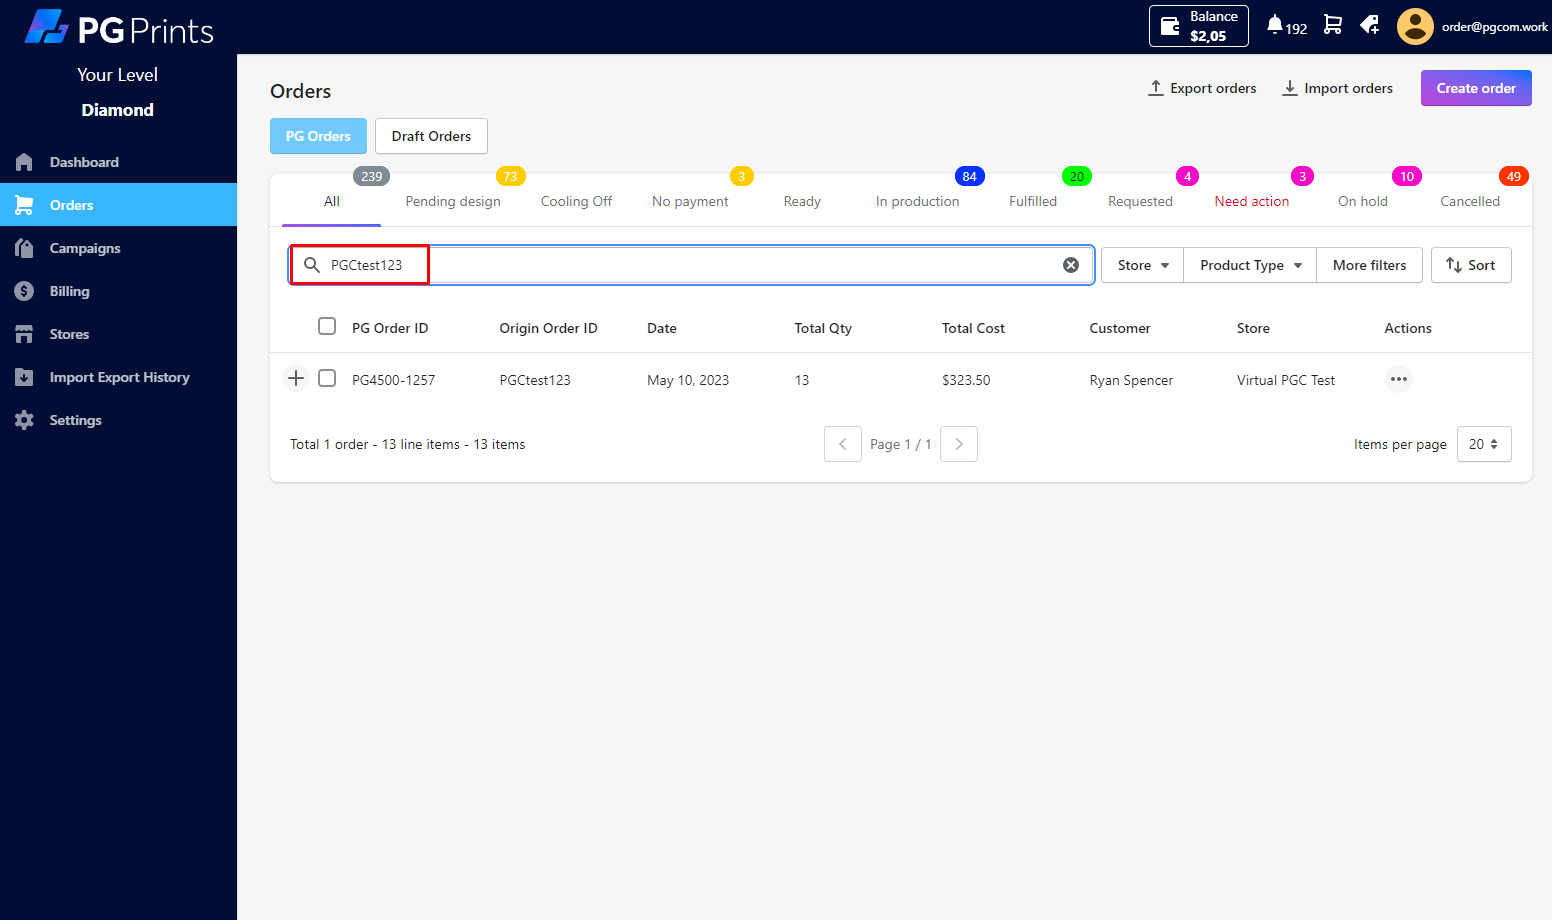
– Step 5: After having completed all the information -> Select Submit -> Check if the order has been successfully created.
*)Note:
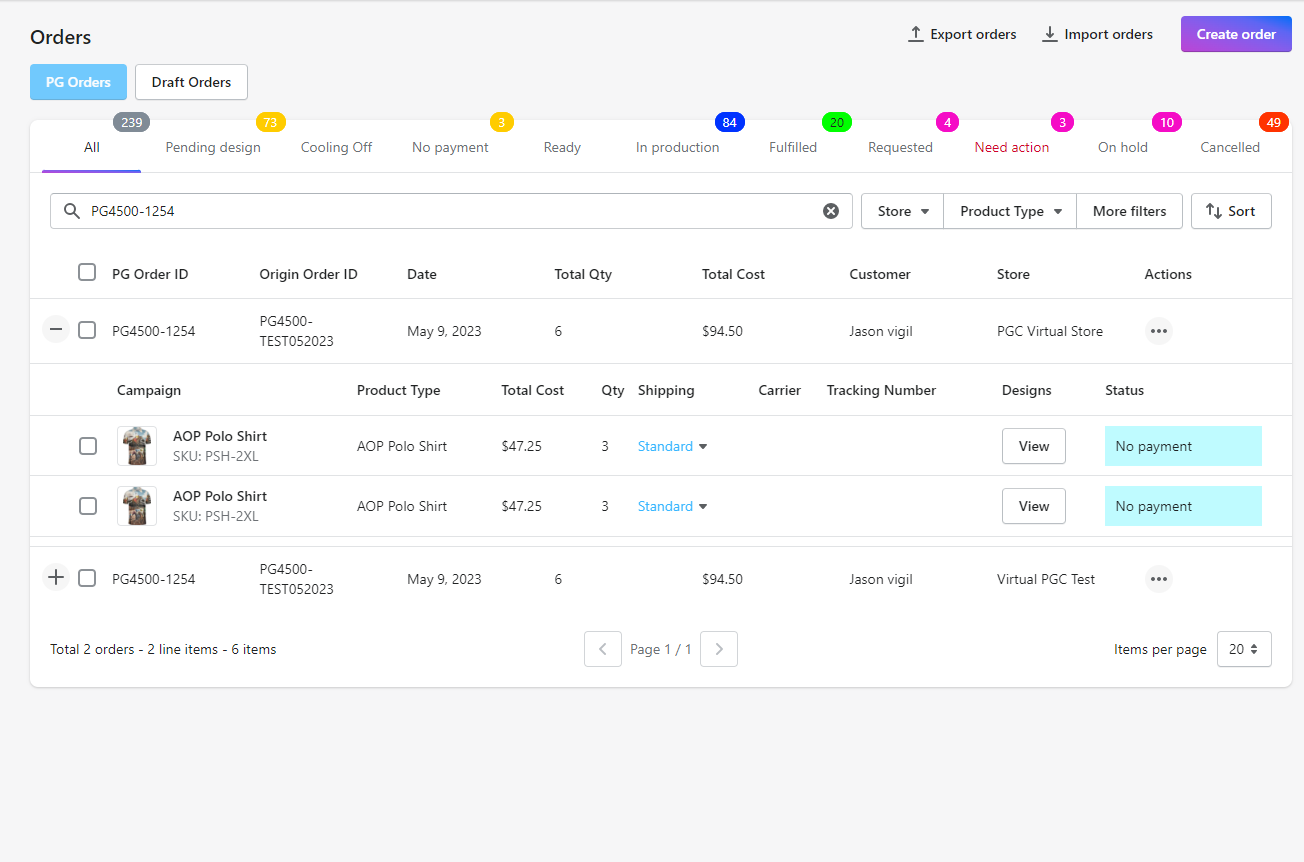
+ For products that are enabled “Personalized”, when choosing 2 same sizes, the APP will make 2 line items, 2 separate designs:
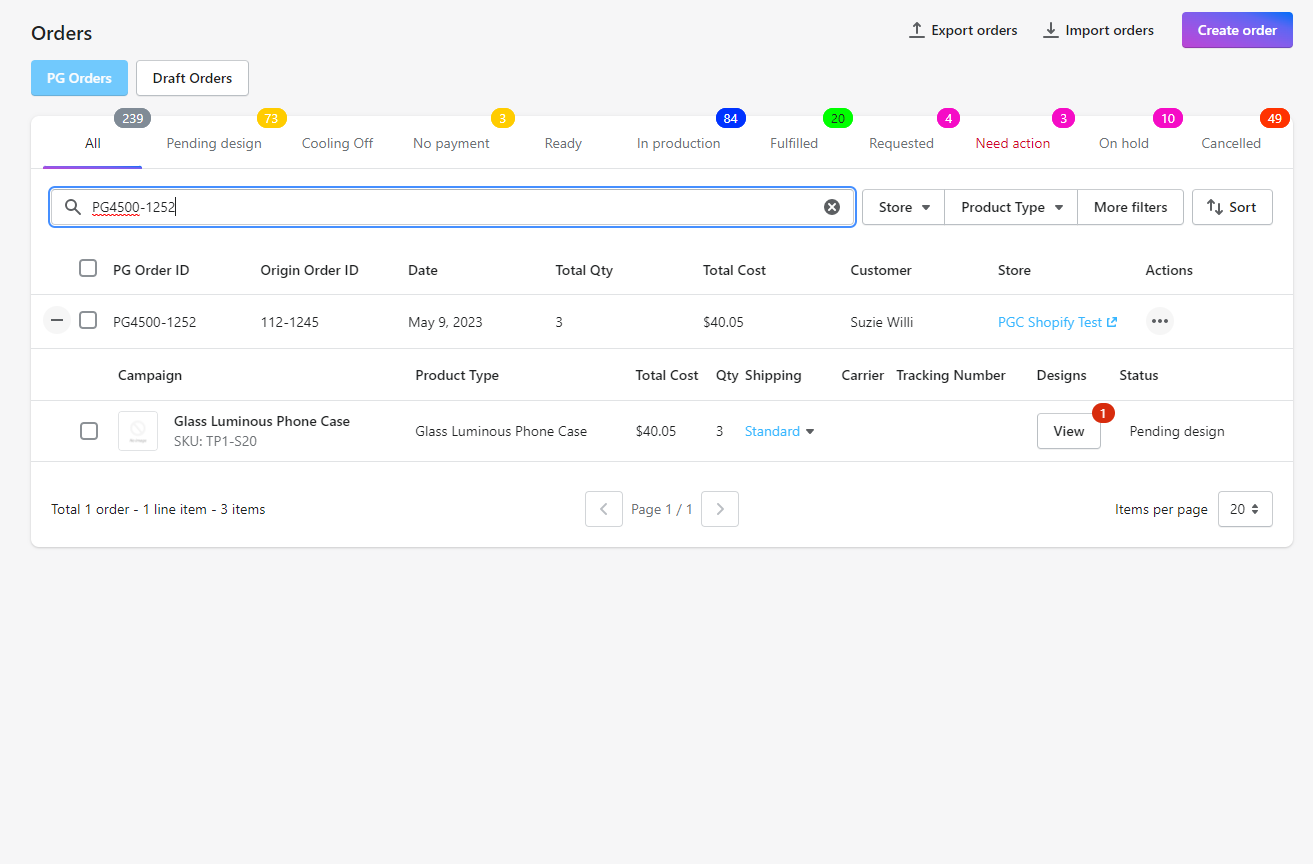
+ For products that aren’t enabled “Personalized”, when choosing 2 same sizes, the APP will accumulate the number of items:
- Directly create order on app without uploading campaign:
– Step 1: Click to Orders -> Create Order
– Step 2: Click to Edit in Source -> select Store and fill in Original Order ID -> Confirm.
– Step 3: Shipping Address, click to Add -> fill required information -> Confirm.
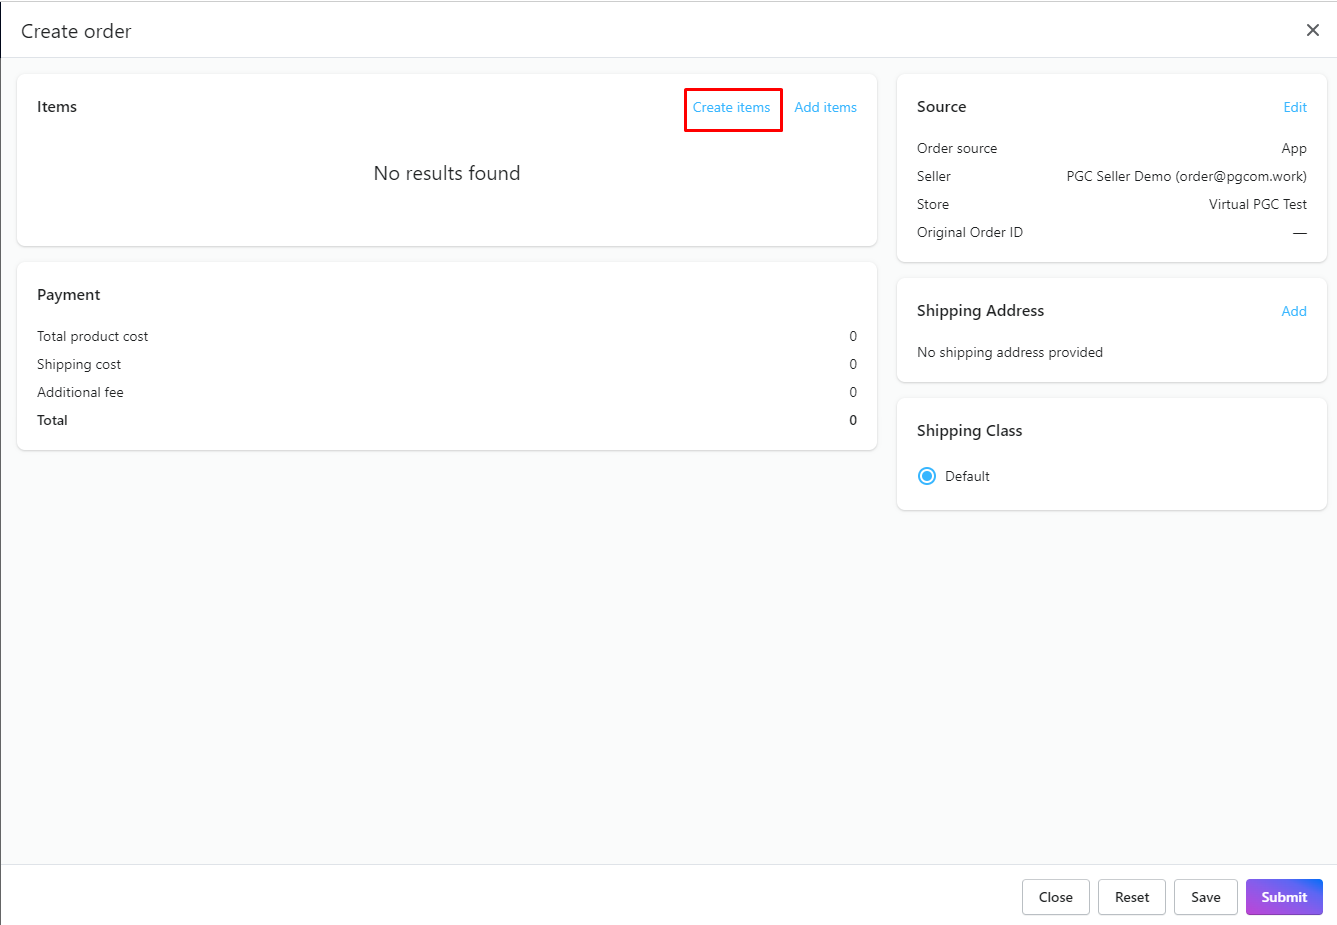
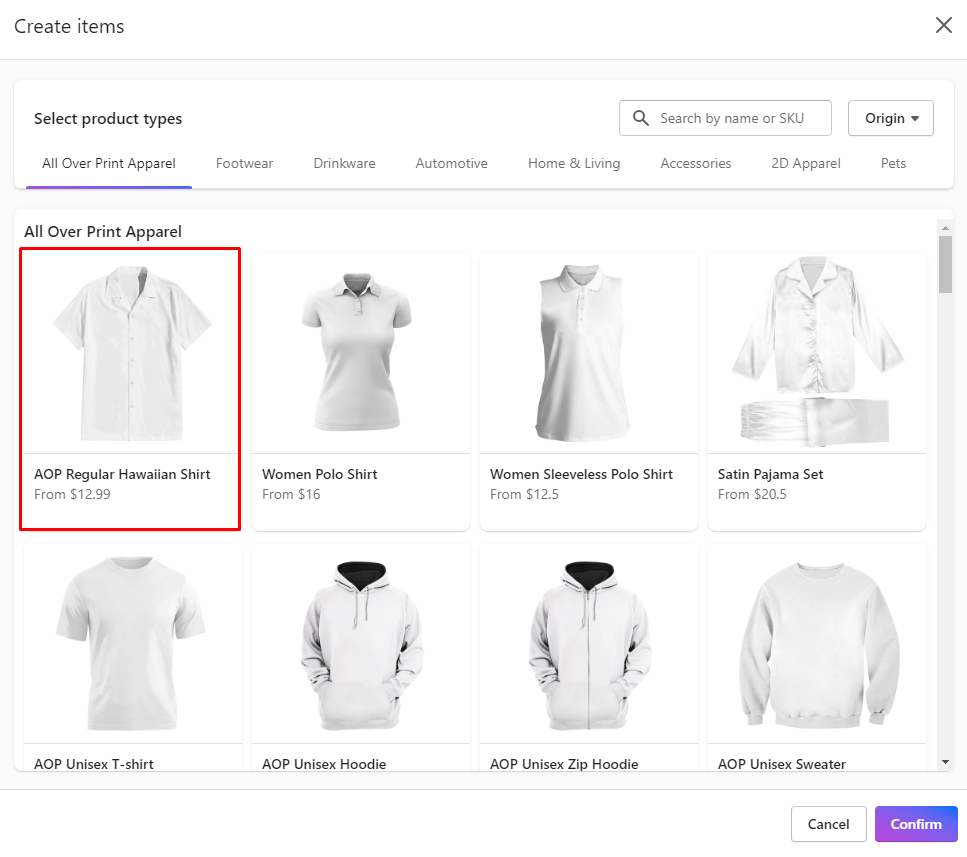
– Step 4: Click to Items -> Create items -> Select product types -> Choose items -> Confirm

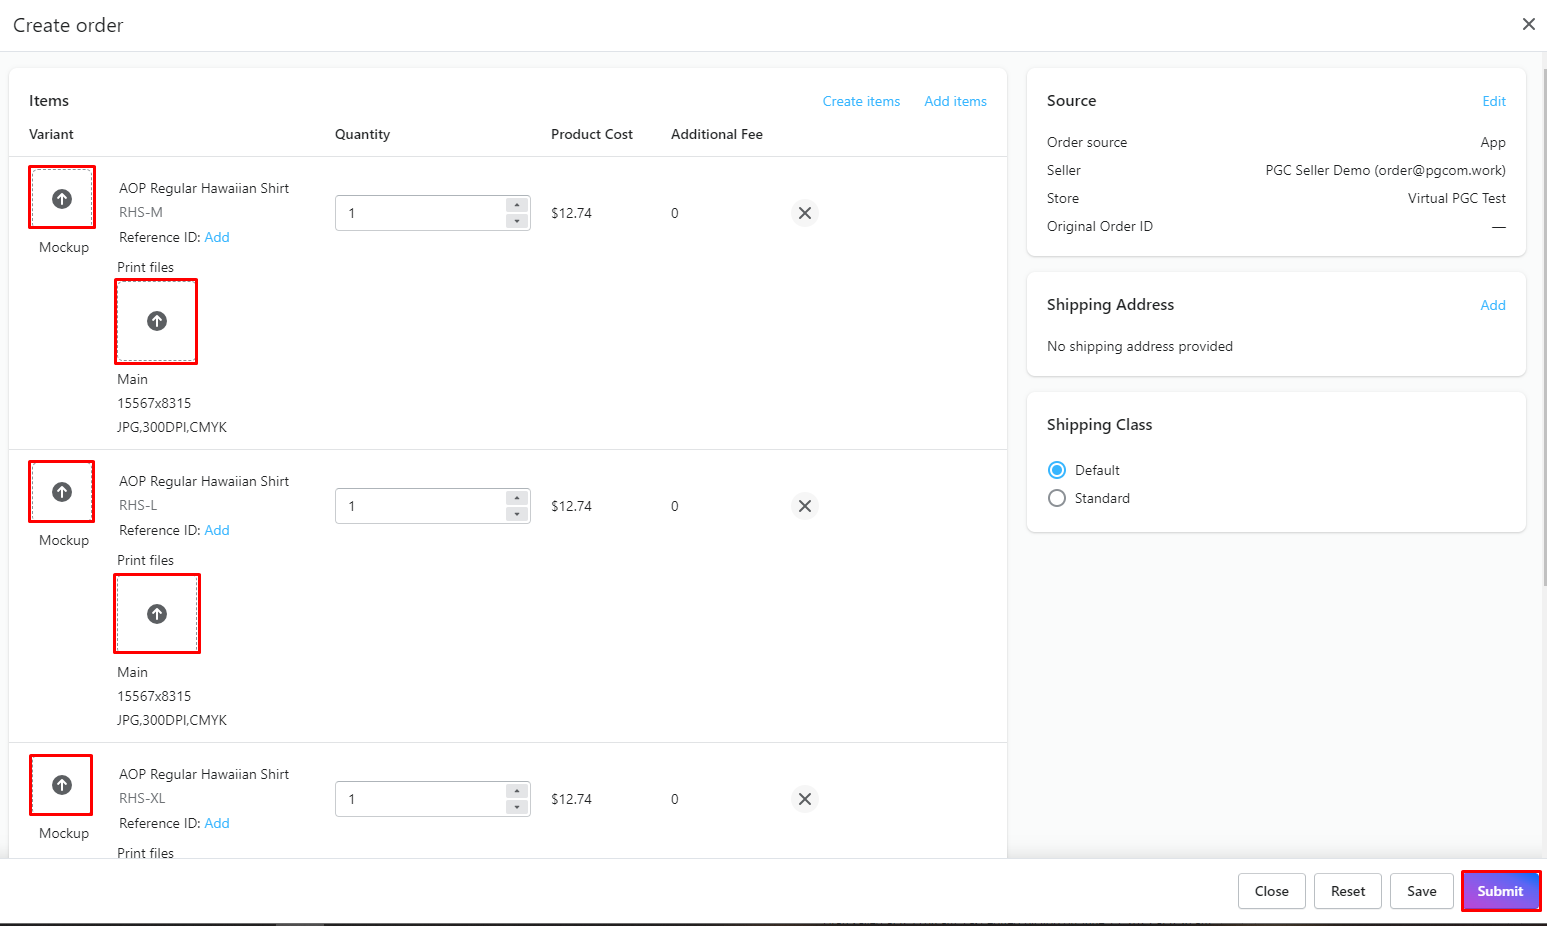
– Step 5: Seller upload design and mockup -> Confirm
2. Import Orders with CSV ==>Video Demo
Please read here
3. Sync orders from online stores ==> Video Demo
PGPrints App can sync orders from Shopify/Woo after the campaign is connected to the App (the campaign is created in App or migrated to App).
- Step 1: Connect to your store
– You choose Stores -> Add store
– Fill required information and then click “Submit”
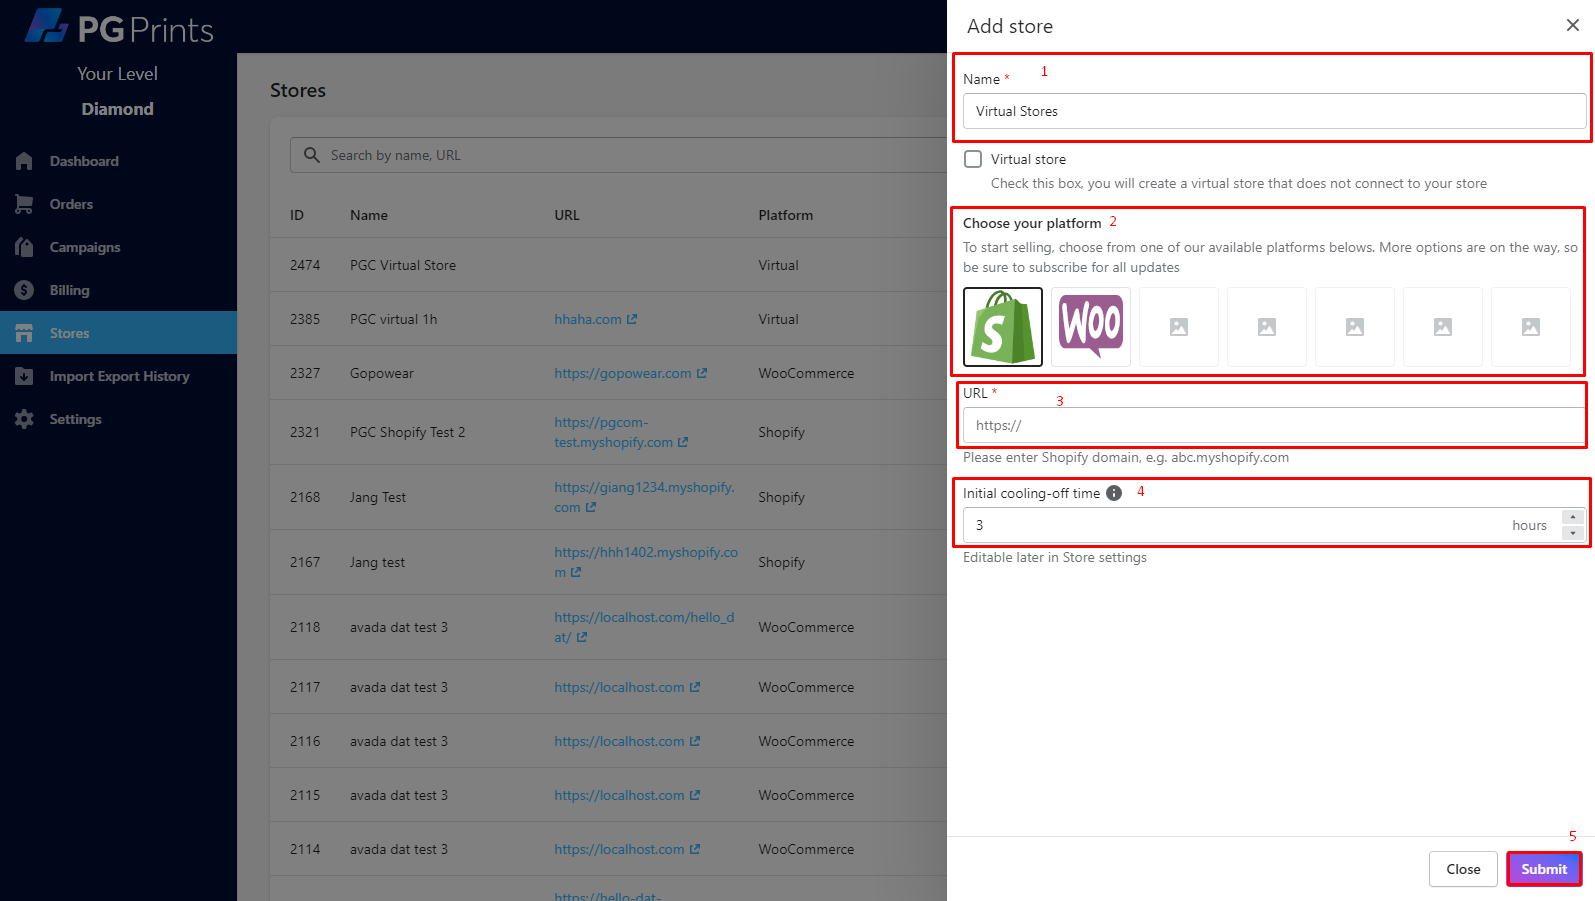
+ Name: Choose your store name
+ Choose your platform: Woo or Shopify, depending on the respective store’s platform which you want to connect.
+ URL: Link of store that you connect. At the beginning of site url must have “https://”.
+ Initial Cooling-off time: time before PGPrints charges your orders to process. In this time, you can unconditionally cancel or change your order.
– Login and confirm your role in the store
- Step 2: Upload or Migrate your campaigns and designs (For details, please read the instructions of “How to add new campaigns or “How to migrate campaign from online stores” sections).
- Step 3: Orders placed of the connected campaigns will be automatically synced with PGPrints app. Kindly check if you want to modify anything in Orders list.


