
If you don’t use 2 platforms: Woo or Shopify to sync orders, you can create orders directly by the virtual site. This section will guide you on how to fulfill CSV through our app. It includes 4 steps: log in or create an account on the PGPrints app -> Create a virtual store -> Select the import orders section on the app -> Choose the store and import the CSV file onto the app.
Step 1: Login Or Create Account here.
- If you have account before, you will fill information and log in to your account:

- If you don’t have account, please sign up here
– After filling information, your account is successfully created on our app
– Log in to your account

Step 2: Create Virtual Store
- Click to Stores -> Add store

- Fill information -> Submit
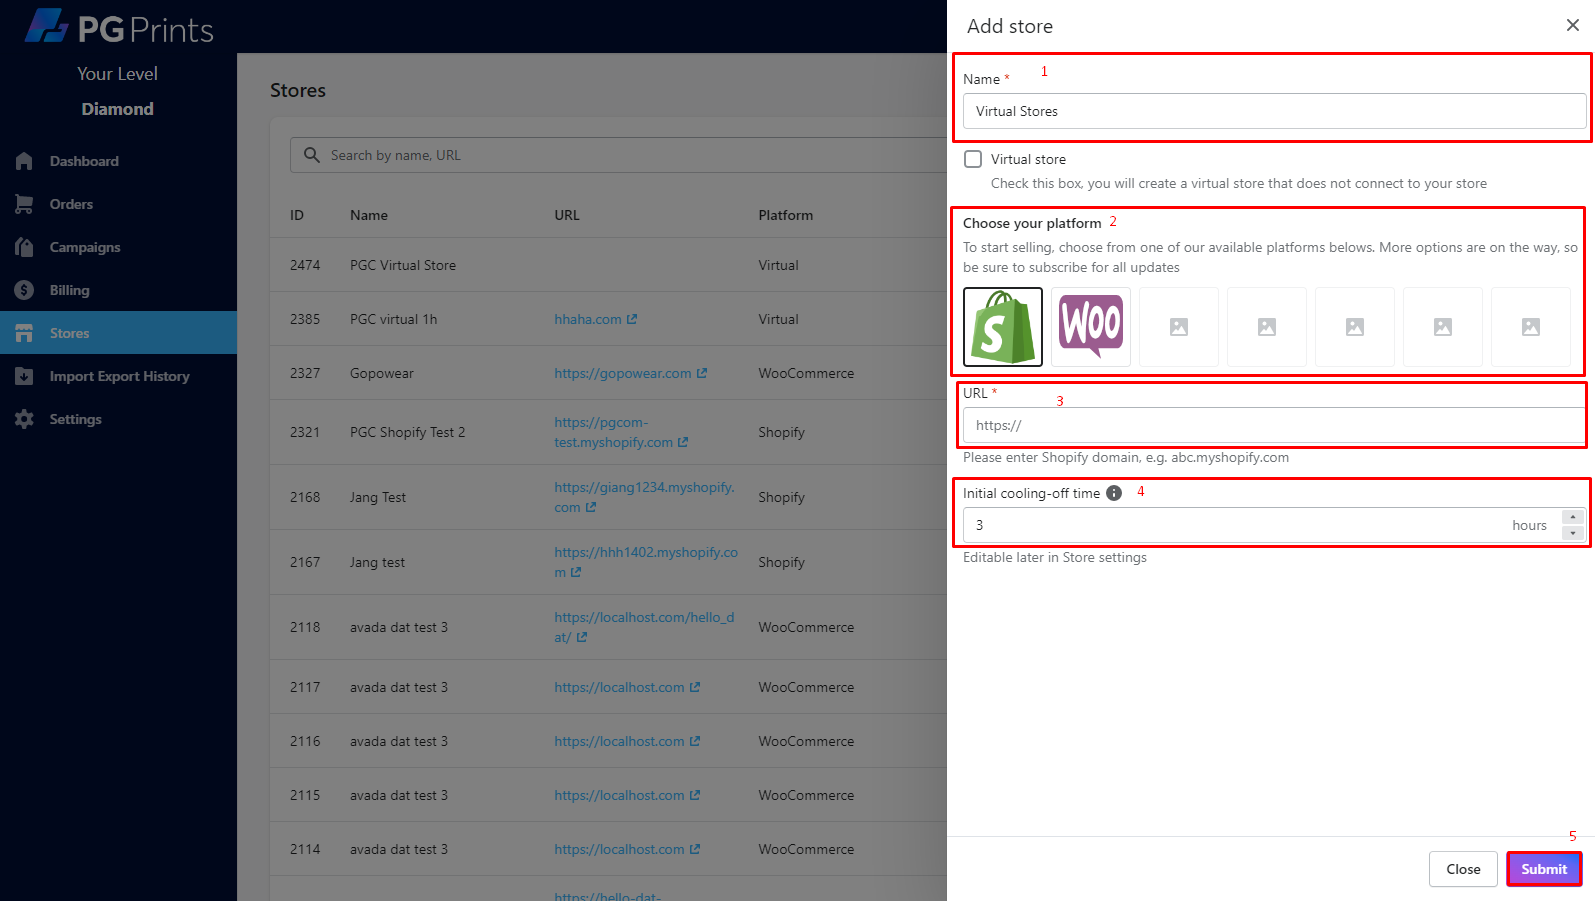
– Name: Choose your store name
– Initial Cooling-off time: time before PGPrints charge your orders to process. In this time, you can unconditionally cancel or change your order.
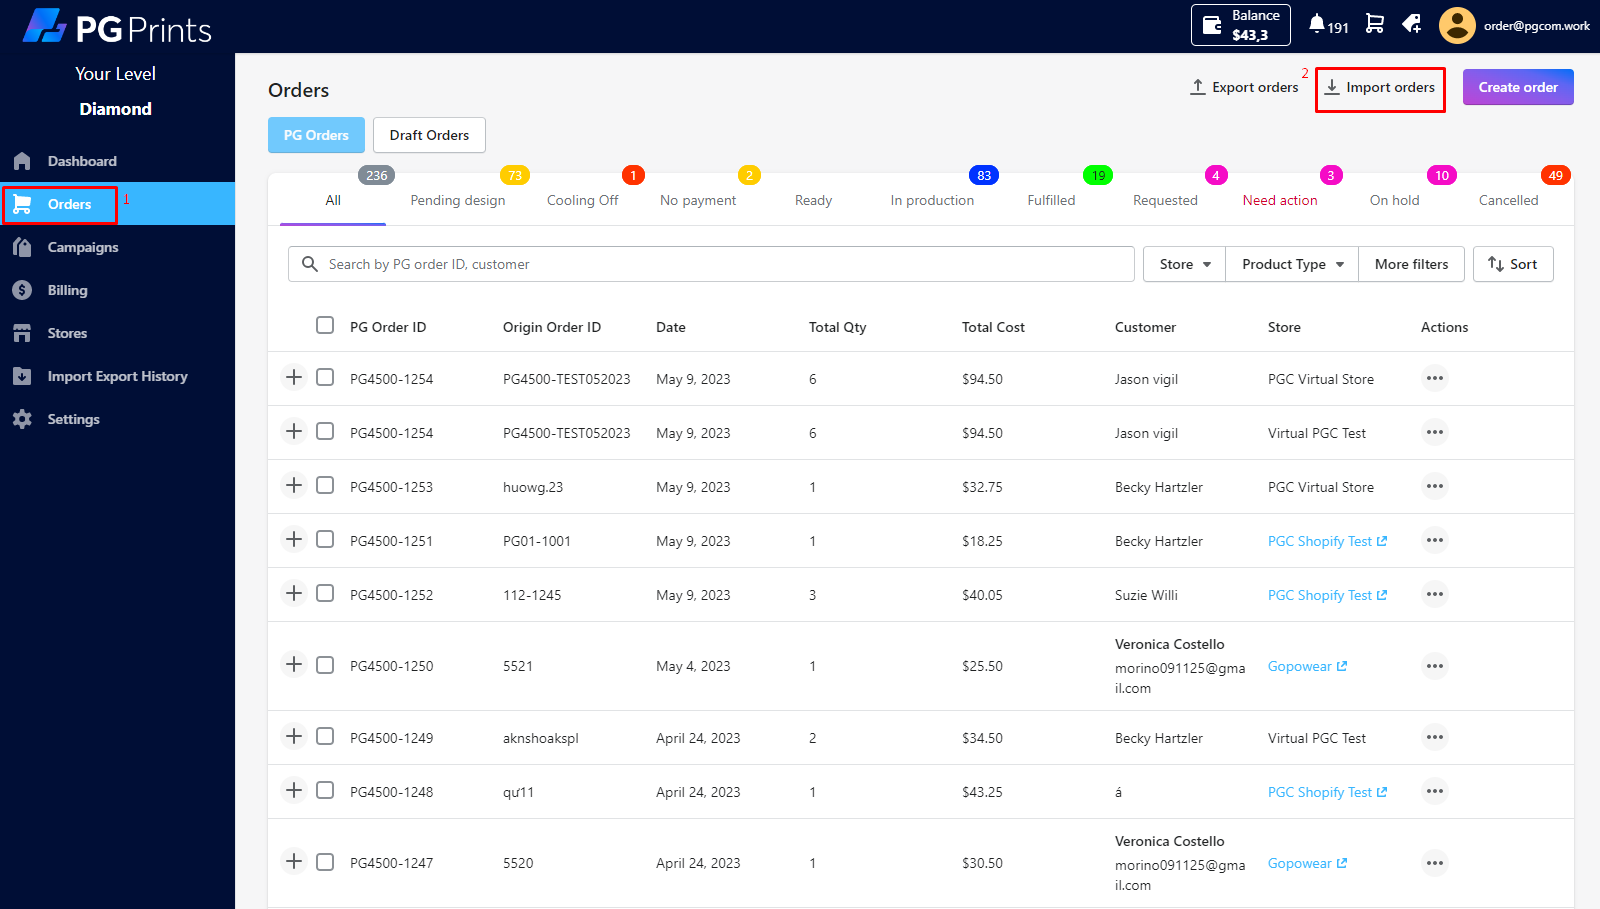
Step 3: Click to Orders -> Import orders
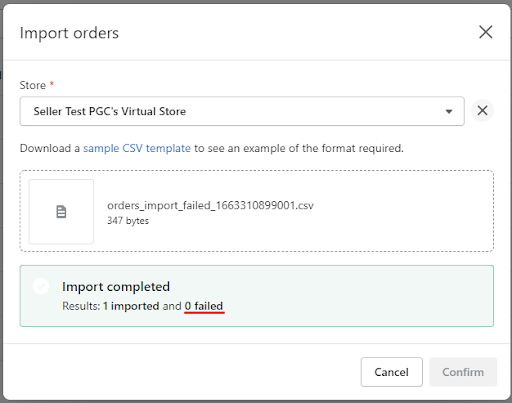
Step 4: Select the store -> Add the order file in CSV format -> Confirm.
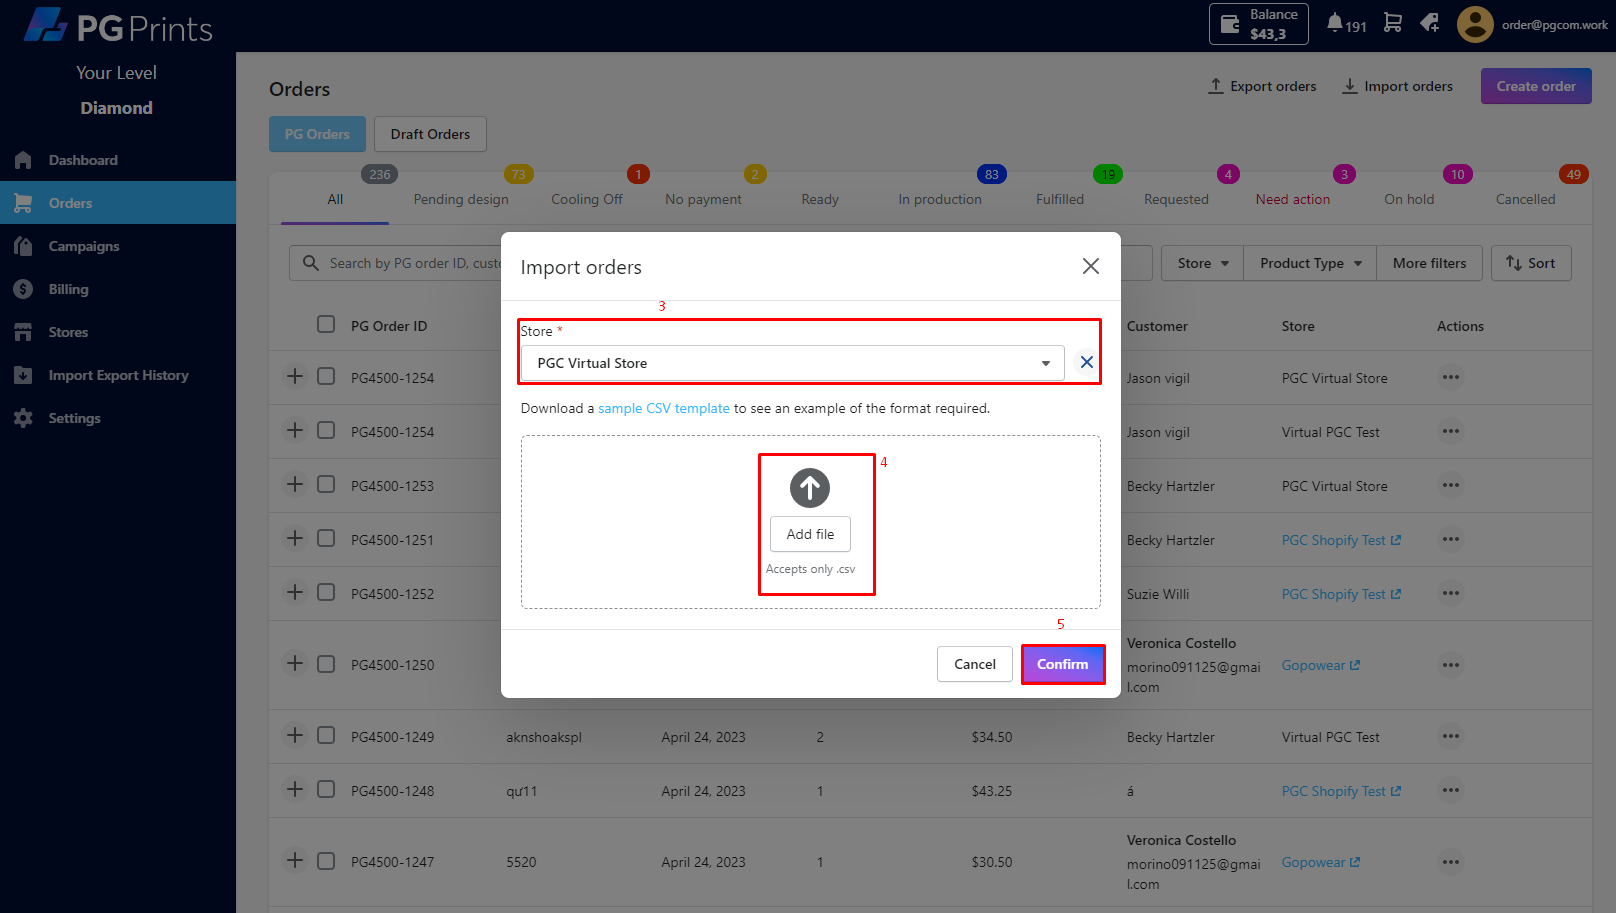
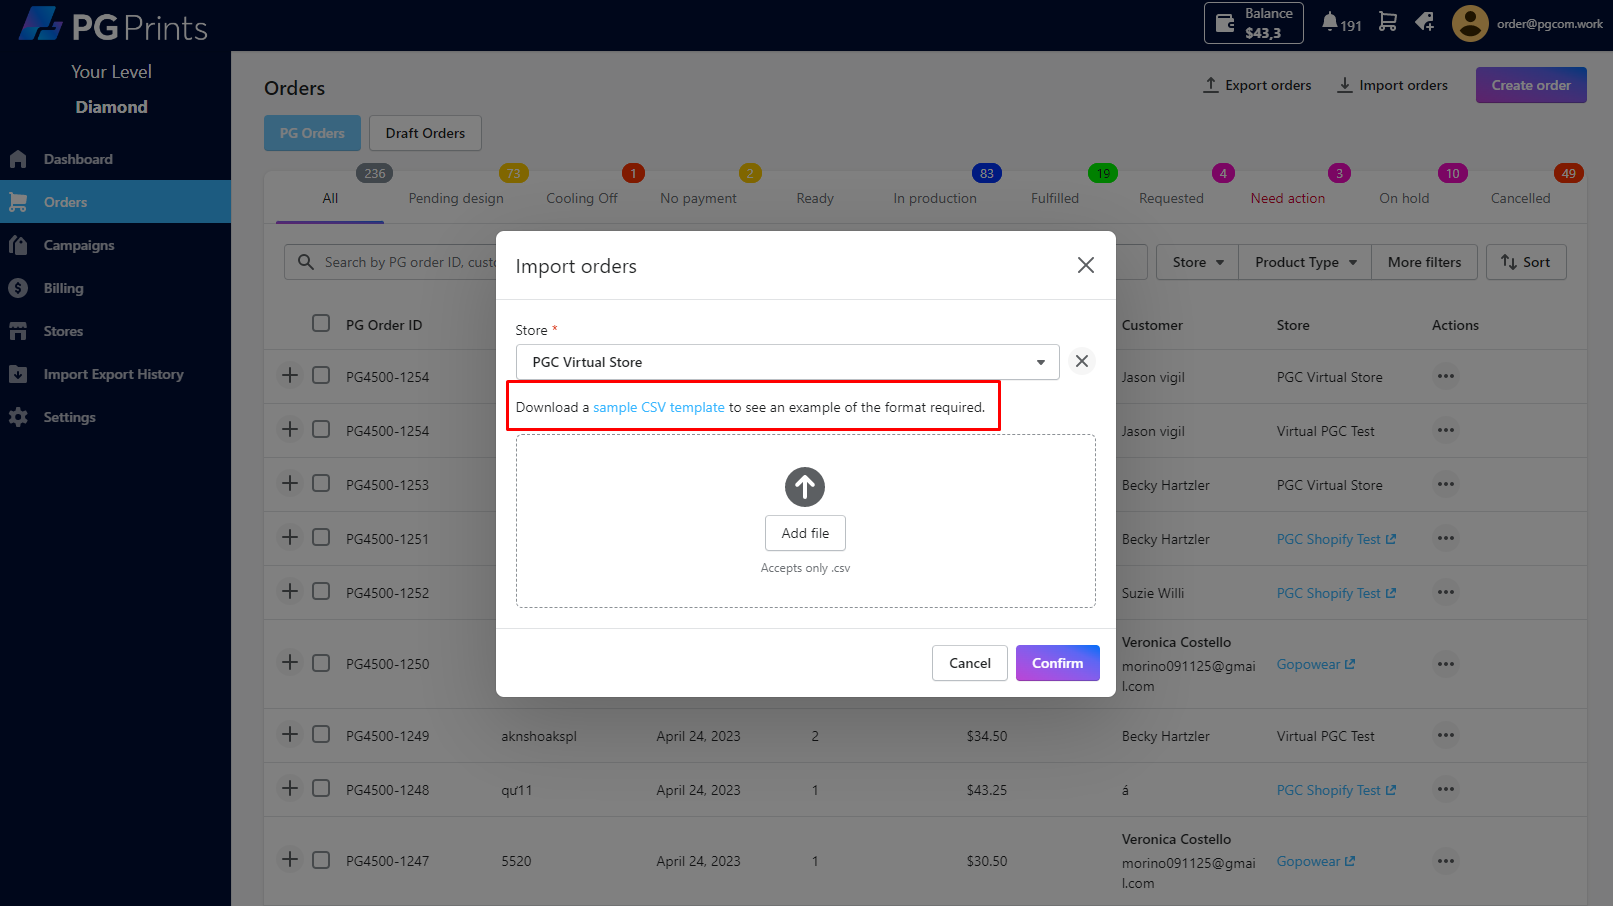
- If you don’t have a sample file before, please download it here:
- Fill all information of the order file -> Add file -> Confirm.
- Check order list whether orders are successfully imported or not
*) Explanation of the information to be filled in the order file:
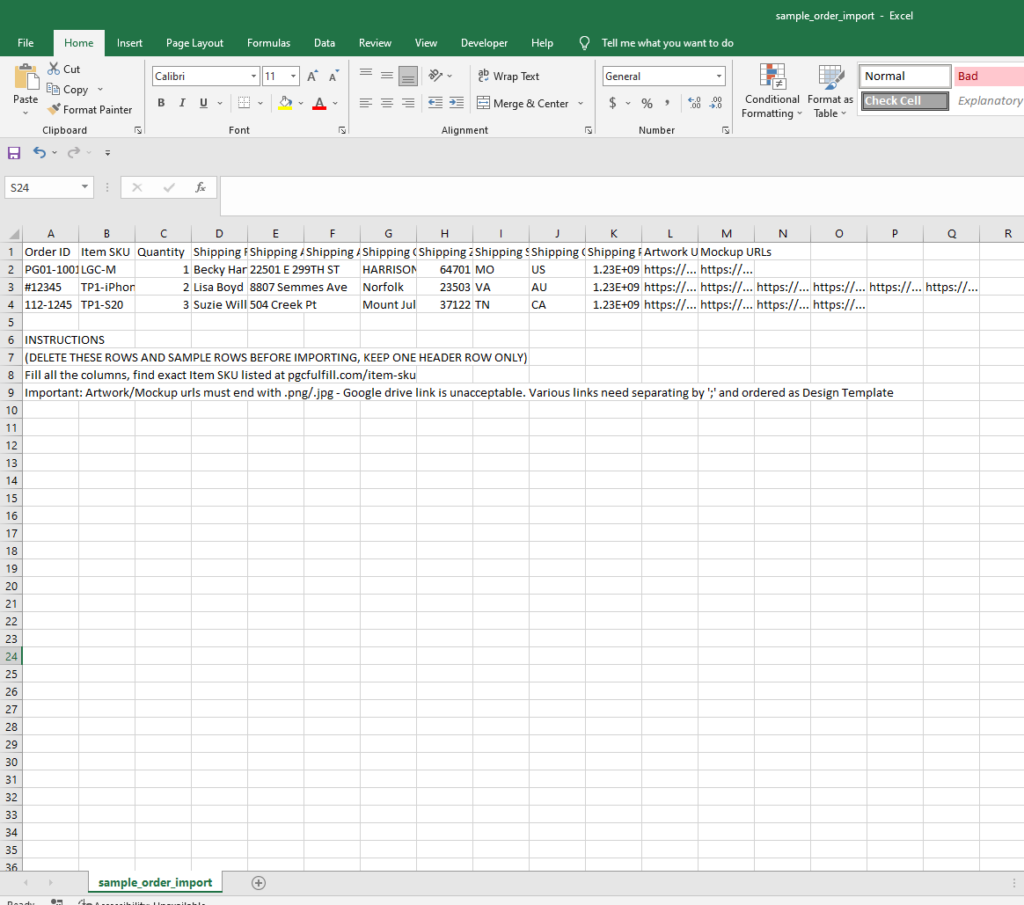
– Order ID (required): Order identifier. Each orders has a unique Order ID. Same Order ID which appeared in system on same store will NOT be imported nor updated. In one file, many lines with one Order ID will be collected as one order (kindly make sure all addresses are the same)
– Item Sku (required): The identifier in the PGPrints app system of the ordered item. To get this code, the seller gets the corresponding product code here.
– Shipping Full Name (required): Name of recipient (including First name and Last name).
– Shipping Address 1 (required): Delivery address (house number, street name…).
– Shipping Address 2: Additional address when receiving goods (numbers of buildings, apartments…).
– Shipping City (required): City’s name of receiving goods.
– Shipping Zip (required): also known as Zip code. It is the postal code.
– Shipping State/Province Code (required): Capitalized 2-letter abbreviation of province/ state where the goods are received.
– Shipping Country Code (required):Capitalized 2-letter abbreviation of country where the goods are received.
– Shipping Phone (required): Phone number to received goods. PGPrints recommends all orders should have phone number. With orders without phone number, PGPrints can not take responsibility if the goods is lost or returned during transportation.
– Artwork URLs: Design links for printing. Published google/NAS file shared links are acceptable.
– Mockup URLs: Mockup links of the product with their corresponding designs
*)Note:
– Shipping State/Province Code and Shipping Country Code information must be 2-character abbreviations. Eg: US, GB, NY, AZ…
– Artwork/Mockup urls must end with .png/.jpg/.tif/.eps – Google drive links and web html links are unacceptable. Various links need separating by ‘;’ and ordered as Design Template.
- If the import process encounters an error, you can retrieve the corresponding error file by following the instructions provided:
– Download the error file and check ” Failed Reason” column

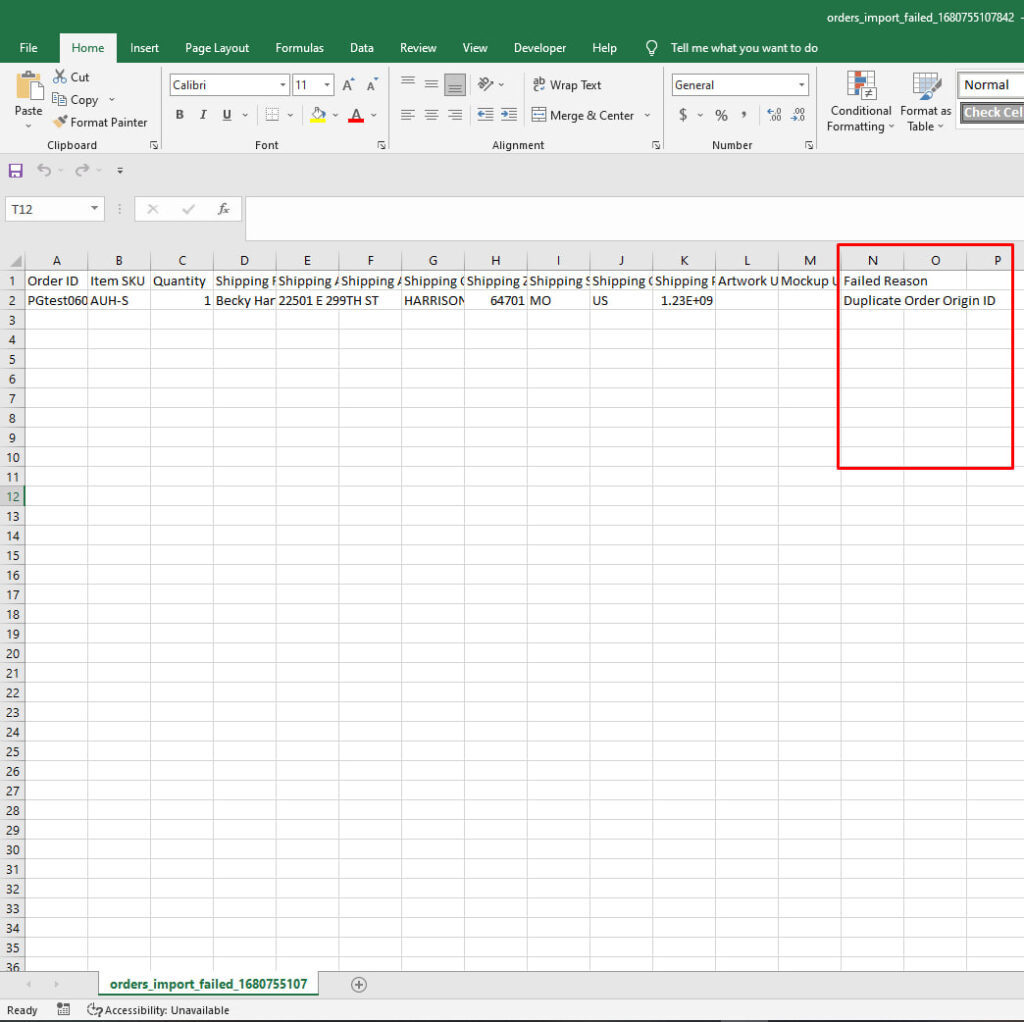
– After you have identified and resolved the issue, simply re-add the file to the application. Once the upload is successful and the application displays “0 failed,” please navigate to the Orders section to confirm that the order has been successfully created.
- Here are some common errors when importing files unsuccessfully and how to fix them:
– Duplicate Order ID: The order name already exists and is on the app before -> The seller needs to change to another order ID.
– Wrong item sku: The sku is different from the app sku listed here -> The seller must check and fill in the correct sku.
– Missing required information in one of the columns: shipping name, shipping address, shipping city, shipping zip, shipping country code -> The seller should review the file and provide complete information.
– Incorrect design link or mockup format -> The seller should check the link and adjust it according to the requirements.


